Friday, July 30, 2010

Friday Funnies ~ Christmas in July


I promised yummy recipes today, but I must also include a funny...so here ya' go...

Ginger Crinkles
These are delicious, a family favorite, and actually quite healthy
Click HERE to go straight to the recipe


Mammo's Gingerbread
My Grandma always made Gingerbread (her Mom's recipe) when I would visit her.  Gingerbread is so good at anytime, breakfast, snack (with coffee of course) or dinner dessert.
Click HERE photo to go straight to the recipe


Did you ever try the "Minty Mocha" from Starbucks?  If you did, did you fall in love with it?  I did.  But love can be costly, so I decided to make it at home!

I had a gazillion leftover candy canes from decorating my house...so I crushed them in a zippy bag with a hammer...
Until they looked like this...
Then I brewed some of my favorite coffee...while that was happening I whipped some fresh whipping cream with just smidge of sugar...
Add to your coffee some chocolate syrup or some Ghiradelli hot cocoa powder, then stir in some of those crushed candy canes as a sweetener and flavoring....top with PLENTY of that freshly whipped cream...Oh YUM!
Don't forget to give a little bit of whipped cream to the dog.... :)

And here's my Friday Funny...another song...


For more Friday Funnies, please visit Kim at Homesteaders Heart! :)

Thursday, July 29, 2010

Christmas in July ~ Day 4 ~ Bling Decor in under 20 minutes

I timed this.  I took me 18 minutes and I TOOK PICTURES along the way! 

Do you know what that means?  It means YOU can do this craft in 10 minutes...right?

Here's what you need:

*Frame with removable backing
(About the frame:  I found this cute one at the Thrift Store.  You can use a plain one and decorate it as I did in Tuesday's post, or you could use one from Wally World and just give it a coat of white paint.  Be creative, use what you've got if possible...cheap is good!)

*Some sticky back bling for frame (I used the little stick on rhinestones used for scrapbooking).
*Iron on bling letters

*Scrap of pretty fabric (enough to cover your frame backing)

*Iron

*Wonder Under (I love this stuff)

*Fabri-Tac, or other fabric glue

Gather your goods...


Take your frame apart.  Get rid of the glass, you won't need it.  This makes packing easier, no need to worry about it breaking in storage.

Cut a piece of pretty fabric about an inch larger (all the way around) than your frame backer.

Cut a piece of Wonder Under just slightly smaller than your frame backer.  Yes, I KNOW, it's for fabric, but it works here too!

Iron it on to the BACK of the backer, according to directions (cotton setting, no steam, 5-10 seconds)...

Peel off paper backing

Center fabric piece over Wonder Under.  Iron in place.


Using your Fabri-Tac glue,glue the fabric edges to the back of the board.


Cut away the loose corner pieces of fabric

Inspect your work and pat yourself on the back


Cut out your letters, whatever you want to say.."Joy" "Peace" "Hope" Merry Christmas"...you might have a BIG frame! :)

Peel off black backing and position them on your fabric covered board.


Cover with a cloth.

Iron on Cotton setting for 15 seconds holding still.  10 seconds moving around.  Finish with a steam blast.  Don't over iron.

Set aside to cool and go to work on blinging your frame...

Put your sticky bling wherever you want it...I am thinking Christmas...candles reflecting...sparkles everywhere...I get a little bling happy, can you tell?


Once you have finished blinging your frame, grab your fabric covered backer; remove the plastic cover pieces.

Set it into the frame and secure it.

How about that?  Wasn't that SUPER easy???  And so pretty too!

Come back tomorrow!

It'll be our last day for Christmas in July Week...and I'll be participating in Friday Funnies...Christmas version! :)

I'm also going to share a few yummy recipes....Mmmmm, Christmas goodies!


Surely you should make them before December so you'll know if they're worth having!

Here is a picture thought for today...Sunset in Key West...


Pop over to Homesteaders Heart to see what Kim's got going on for Christmas in July today...

Wednesday, July 28, 2010

Christmas in July ~ Day 3 ~ NO SEW Accent Pillow!

Yes, I know it's hard to believe when you look at it, but you will NOT sew anything to make this pillow.  So if you are a NON sewer (hmmm, how about NON seamstress), then you will like this quick, fun project!


I made this in under an hour, using stuff I had laying around.  Think outside the box!  Old cotton blouses, old towels, napkins or tablecloths.  If you MUST buy something, go to the thrift store, you can buy a shirt for less than $2.00, most likely cheaper than buying 1/2 a yard of new fabric.

You will need:

*Some sort of fabric for front and back of pillow, whatever texture and color suits your taste.

*Trims (thrift store's usually have bags of old trims for cheap), or pull stuff off the bottom of an skirt.

*Bell, bobble, button or some sort of cute somethin'

*Wonder Under (or any two-sided fusible web)...I use Wonder Under and a yard goes a LONG way.

*Fabri-Tac Permanent Adhesive for fabric

*Scissors and an Iron (hot, no steam)

*Pillow Stuffing

I've had this cute cotton shirt hanging in my closet for over a year.  Every time I decide to wear it, I am reminded that it "sits weird" on the body, and is not comfortable.  So it went into the Goodwill pile...then I decided to use it for this project instead!


Cut 2 pieces of fabric to the size and shape you desire.  I just cut off the bottom half of the shirt.

Trim the edges to straighten a bit (nothing too fancy)

Draw a pattern on a piece of paper, I wanted a Christmas Tree.  You could trace a cup mouth for an ornament ball, or do a star, or a whatever you desire, something simple is best.

Cut it out and pin onto your accent fabric (you only need a small scrap)

Cut out your fabric and use the pattern to cut out a piece of Wonder Under (WU) as well.

Trim to make it slightly smaller than the fabric

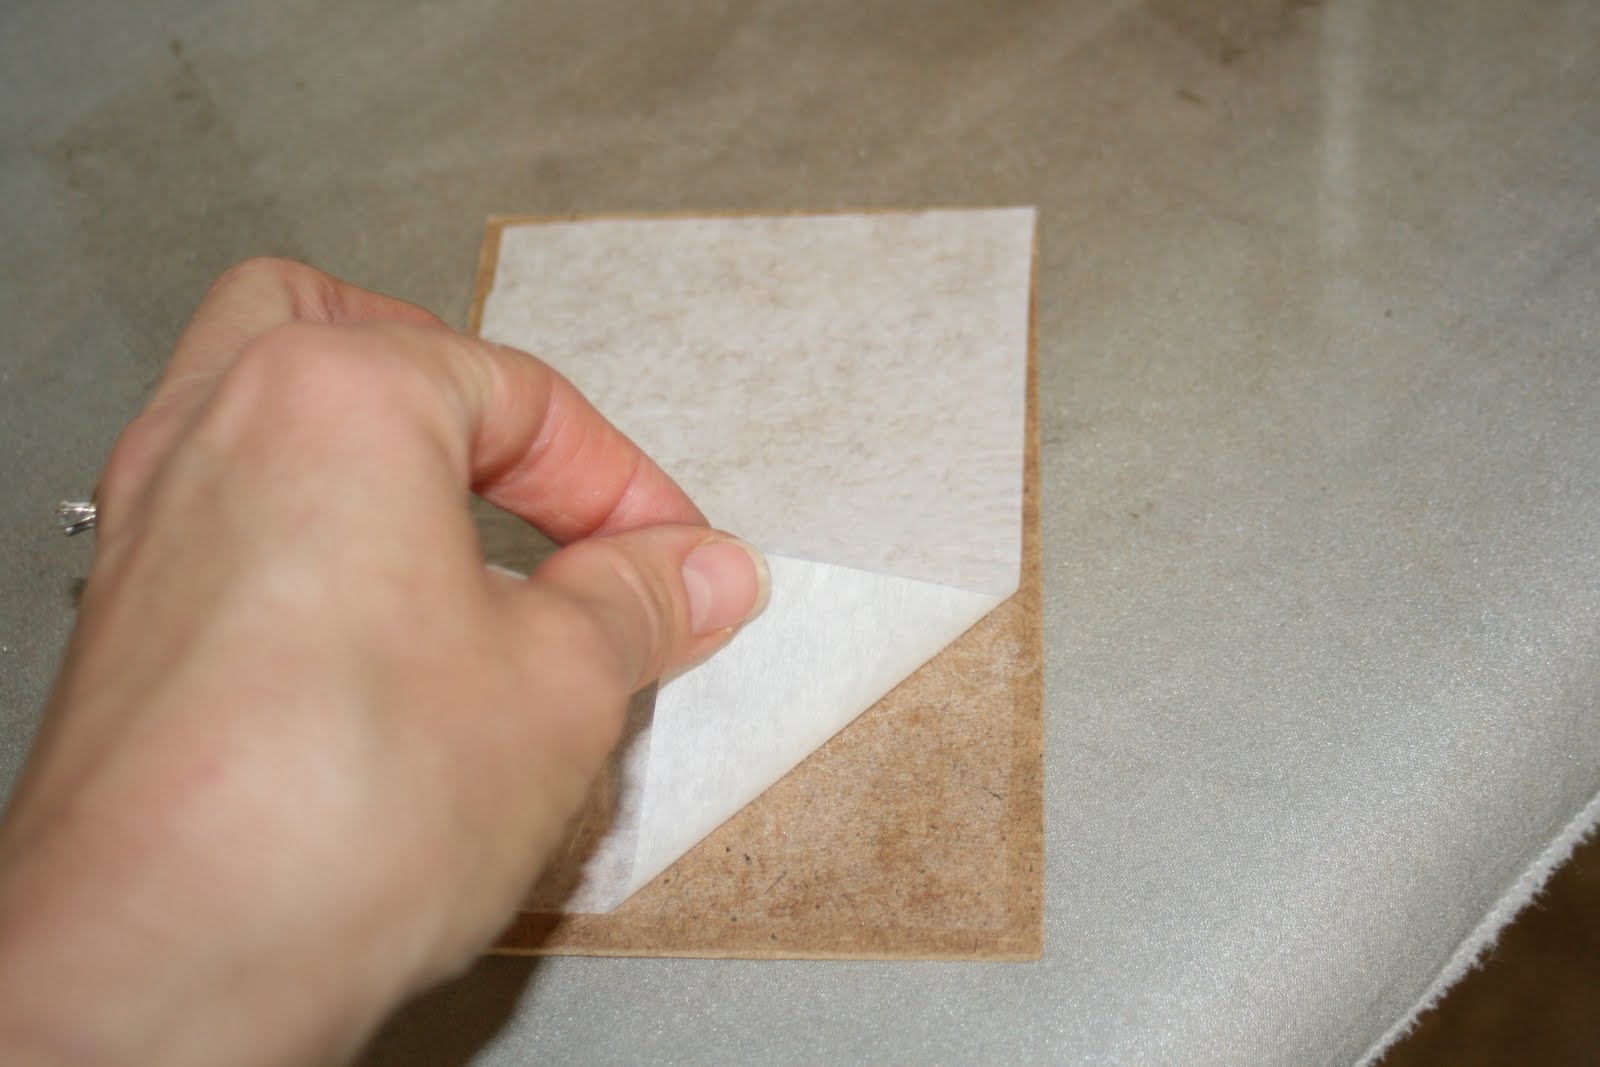
Lay the rough or webby feeling side of the Wonder Under onto the WRONG side of your fabric piece.  Using a hot iron with NO steam, press WU onto fabric for a few seconds.  Cool a few seconds.

Peel off paper backing (you see it leaves a web to fuse to another piece of fabric)

Lay the piece where you want it, and press to adhere.

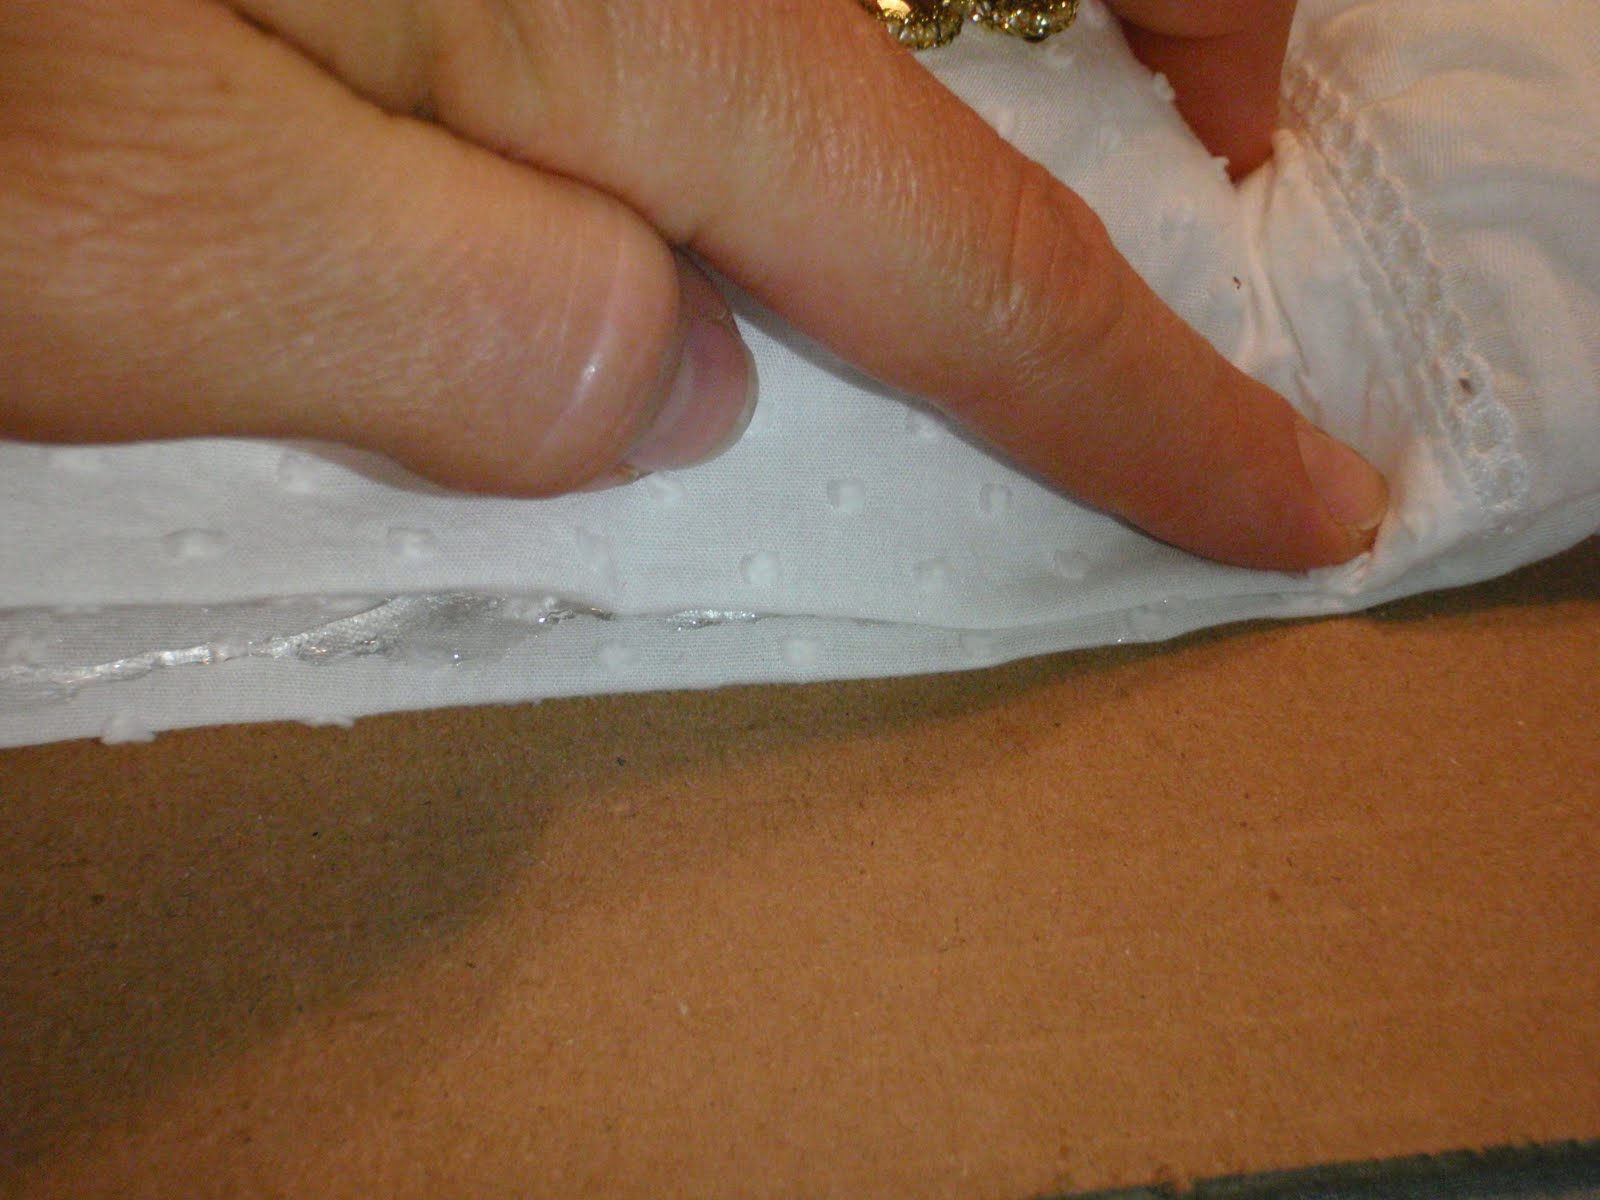
Using Fabri-Tac, adhere a trim (if desired) to the raw edge of your decal.  Fabri-Tac dries pretty quickly, which is nice, you don't have to wait long to move on. 


However, you may want to do just a few inches at a time so it doesn't dry ahead of you.

Press and hold corners and tight curves until dry (just a few seconds)


You can EITHER use Wonder Under or Fabri-Tac to adhere the two pieces together (RIGHT sides TOGETHER)...but you MUST leave a small space, enough to turn it right side out.  I used WU for a neater edge.

Cut 4, 1/2 inch strips of WU.

Lay them onto the RIGHT side edges of one of the fabric pieces.

Leave a space for turning...

Iron on...


Peel away paper backing.


Lay other piece on top RIGHT SIDES TOGETHER...


Iron in place, and turn pillow right side out.


Iron to neaten edges.

Add cute trim if desired.  BE SURE to insert a piece of carboard or hard plastic under where you are using Fabri-Tac, or else you will glue the pillow together!!!

I added a bow to the corner...


And a Bell for a Tree Topper.


Stuff your pillow...

Seal closed with Fabri-Tac.


I decided to add a little lace to the edges, and used Fabri-Tac to glue it on...it really dries fast, so this was quick and easy!

There you have it... a NO SEW accent pillow for Christmas.  You could also make this "Non" Christmas styled and give it as a gift!

Um...IF you use fabric that says NOEL on it, line it up correctly so it actually SAYS "NOEL"...not "OEL"....it's just a thought... :)

See you back tomorrow where I'll show you how you can make this

in LESS than 20 minutes (and that was WITH me taking photos!)

Be sure to hop over to Homesteaders Heart and see what Kim's got going on for Christmas in July week!